Dealing with clumped mascara is one of my top makeup pet peeves. It may seem like a minor detail, but it can significantly impact your overall makeup look, regardless of how flawless the rest of your application may be. Trust me, I’ve been there too, making every mascara mistake in the book, from clumping to smudging and improper application.
However, I’ve learned from my experiences, and put together some of my best tips, tricks, and hacks to help you apply mascara like a pro. Discover these expert techniques to achieve stunning lengthening and volumizing effects with your mascara!
1. Start with Clean Eyes
Starting with clean eyes may seem like a no-brainer, but when I say clean eyes, make sure there are no remnants of yesterday’s mascara left on your eyes or it will interfere with today’s mascara. This is especially true for those with sensitive eyes, leftover mascara can be very irritating.
2. Apply You Eye Makeup First
One of the best tricks to ensure your eye makeup doesn’t ruin your face makeup is to start with your eye makeup first. That way, if your mascara smudges, you can easily clean it up! This has been a game-changer for me.
3. Use a Lash Curler

A lash curler isn’t only for curling the lashes, it also helps all the eyelashes lie in the correct position. Lashes frequently get bent out of shape, causing messy mascara. Using a lash curler for a couple of seconds before applying your mascara, can make all the difference in how your mascara looks!
4. Put your Mascara Under Warm Water
Mascara can often get clumpy inside the tube, which means once you apply it, it will definitely be clumpy too! The best hack to fix this is to warm up your mascara tube. My favorite method is to hold the mascara tube under warm water for a minute or 2, but I’ve also seen people mention that they use a hair dryer. The point is to get the mascara heated so the clumps disappear!
5. Twist the Mascara Wand Out to Avoid Clumping
A common habit with mascara is to pump the wand in and out of the tube. But, what this actually does is clump up the mascara. Instead of pumping the wand, twist it out as you remove it for smooth mascara.
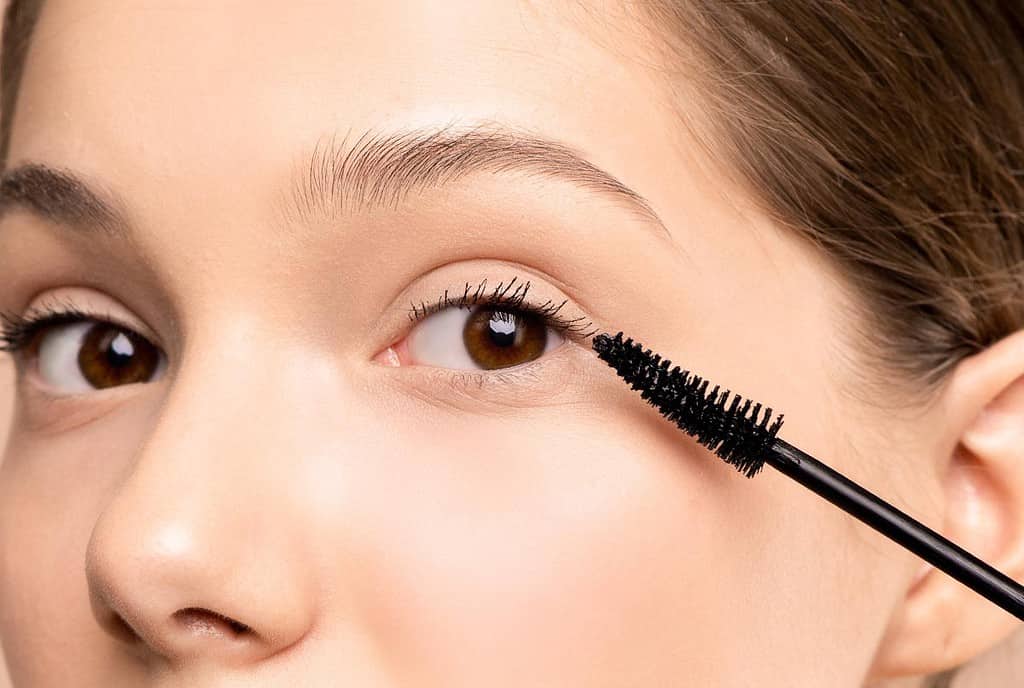
6. Apply Mascara From the Roots
The best eyelashes are the ones that look naturally long and thick. There’s an easy way to get the look without false lashes. Apply your mascara slowly from the roots, allowing your lashes to open up and get the most even coverage from your mascara.
7. Wiggle the Wand on Your Lashes
As you apply your mascara, slowly wiggle the wand on your lashes, this ensures that your lashes get separated and not grouped together.
8. Use the Wand Vertically to Apply to the Inner and Outer Corners
Another cool hack for a false lash, volumized mascara effect is to not forget about your eyelashes on the inner and outer corners. Easy to forget, I know, and that’s because they can be awkward to reach. To get to these hard-to-reach areas, use your wand vertically, it does the trick!
9. Don’t Overdo the Lower Lashes
The lower lashes are best kept simple, let the upper lashes get all the attention! Apply a thin layer of mascara to the lower lashes to open the eyes. Bear in mind that if you have oily skin, the lower lashes are more likely to smudge.
10. Use a Clean Spoolie to Remove Clumps
Even with following these tips and with the best mascara, there can still be clumping. To get rid of the clumping after you’ve applied mascara, a hack that always works is to take a clean spoolie and gently comb through the lashes.
11. Use Waterproof Mascara

If you struggle with mascara smudging, the answer lies in using waterproof mascara. Not only does waterproof mascara effectively prevent smudging, but it also offers long-lasting wear.
However, be careful not to pull out lashes when removing the mascara. Opt for a gentle makeup remover that’s designed for waterproof makeup.
12. Replace your mascara regularly
Often, the secret to achieving long and voluminous eyelashes lies in something as simple as replacing your mascara regularly. Over time, mascara can become ineffective and clumpy. For optimal results, it is recommended to replace your mascara every couple of months.
It doesn’t need to be pricey or break the bank. There are loads of quality drugstore mascaras that give beautiful lengthened and volumized lashes.
My Thoughts
With these simple and easy mascara tips, you can transform the way your mascara looks. These hacks help add length and volume to your lashes. The best part is, you don’t need to spend a lot to get beautiful thick eyelashes. Getting the false lash effect is within everyone’s reach!
UP NEXT: 10 Easy Eye Makeup Tips & Techniques For Older Women Over 60
Hollie xx

About Hollie
Hi, I’m Hollie, and I own BeautywithHollie.com. I love everything to do with beauty and love sharing my knowledge, advice and beauty finds! Makeup and beauty are here to enjoy, and Beauty With Hollie is here to take the stress out of it!
-
CurrentBody Skin Radio Frequency Device Review- Does it Actually Work?
-
Eye Makeup Tips You Need To Try for Sensitive Eyes
-

How To Use Body Lotion and Its Benefits For the Skin
-
How To Apply Mascara Like A Pro- The Best Hacks, Tips & Tricks
-

City Lips Overnight Plumping Lip Oil: My Honest Review and Real Results
-
10 Easy Eye Makeup Tips & Techniques For Older Women Over 60
-
BareMinerals Complexion Rescue Tinted Moisturizer Review- Find Out The Truth
-
The Ultimate Guide to Different Types of Eyeshadows and Their Gorgeous Finishes
-

The Different Types Of Foundation In Makeup And How To Choose The One For You
Anastasia Beverly Hills
bareMinerals
Benefit Cosmetics
Bobbi Brown
CeraVe
Chantecaille
Charlotte Tilbury
Clarins
ColourPop
Dermalogica
Dior
Dyson
e.l.f. Cosmetics
ELEMIS
Estée Lauder
Fenty Beauty
First Aid Beauty
Fresh
Giorgio Armani
Hourglass
Jane Iredale
L’Oreal
Lancome
La Roche-Posay
Laura Mercier
LORAC
MAC
Makeup Revolution
Maybelline
Morphe
Nars
Natasha Denona
Neutrogena
NYX
Origins
Peter Thomas Roth
Revlon
Sigma Beauty
Smashbox
Stila
Tarte Cosmetics
The Ordinary
Too Faced
Urban Decay
YSL
]]>
My 95-year-old grandmother, bless her, recently asked me for help with her eye makeup. She’s one of the trendiest women around and always looks tip-top, but she simply didn’t know how to apply her makeup for her aging skin which had recently deteriorated a lot. I eagerly accepted the challenge. I put my expertise to use and shared with her some of the best and easiest anti-aging eye makeup tips as well as techniques for older women.
Some of the problems she had were hooded eyes, discoloration around the eyes, lines and wrinkles, dark circles and changes in her eyelashes and eyebrows.
Before you think that you’re not 95, so none of these makeup tips applies to you, let me reassure you that these techniques benefit most women from around the age of 50 or 60. While your skin starts aging from around your 30s’, these eye makeup tips are for once your skin has already aged. They’re easy to implement, even for those who don’t have much makeup practice. Treat your mature and aging eyes to some of the best eye makeup tips and learn how to make your eyes look younger!
1. Use an eye primer

Before applying any eyeshadow or eyeliner, apply an eye primer. An eye primer is super helpful for makeup on hooded eyes as well as wrinkled ones. It creates a smooth base on which to apply makeup and evens out the skin tone of your eyelids.
2. Use cream eyeshadows
Aging and mature skin is often lacking hydration and moisture. Cream eyeshadows are more moisturizing on the eyes and hide eye wrinkes better than powder ones, making them the ideal option for older skin. But that’s not the only reason, cream eyeshadow also has a smoother texture, making it easier to apply to mature skin than powder ones. They also tend to conceal lines giving a more flawless finish.
3. Use matte eyeshadows, not shimmer

Matte eyeshadow is more long-wearing for older skin than shimmers and glitters. Shimmer and glitter eyeshadows have larger pigments than matte ones so they don’t apply as smoothly. Mature eyes have more wrinkles and folds, making it more difficult to get a smooth polished eyeshadow look with shimmer eyeshadows. Stick to matte eyeshadows for mature and aging skin that has wrinkles, lines and hooded eyelids!
4. Stick to neutral shades
Dark eyeshadow ages the face. Instead opt for netural and pink eyeshadow shades which are subtle and improve your overall appearance without making you look older.
5. Fake a Lid Crease
One of the best eye makeup tips for hooded eyes, in particular, but all aging eyes can benefit from is to create a fake lid crease. When you age, your skin often sags making it hard to see where the eyelid ends. Fake it till you make it, and it’s a lot easier than it sounds. All you need to do is create a eyelid shape with your eyeshadow. Doing so will make your eyes appear larger and younger!
6. Opt for grey or brown eyeliner
Keep away from harsh black eyeliner to create a younger, softer makeup look. Instead, opt for softer shades like grey or brown.
7. Soften the eyeliner line
Aside from using a softer color, another great tip on how to apply makeup to aging eyes is to soften the eyeliner line. You can do so by using an eyeshadow powder with an angled brush to apply your eyeliner, or use your regular way and after, with a small brush simply blend it out a little.
8. Use false lashes
False lashes are a lifesaver for many mature women. As we age, the eyelashes tend to thin, leaving you with sparse lashes. Using false lashes opens up the eyes and brings back youth to them.
9. Fill in your brows

Like eyelashes, eyebrows also tend to thin as one gets older and become sparse as one gets older. Use an eyebrow pencil to fill in thin brows. Stick to your natural brow shape and simply fill in where necessary.
10. Use color-correcting makeup around the eyes
Many mature and older women suffer from hyperpigmentation, and it usually gets worse with age. My grandmother has it pretty bad around her eyes, and we found that a little color correcting before concealer made all the difference in her appearance.
My Thoughts
Eye makeup can enhance your face without making you look older. These easy tips will change the makeup game for mature and aging eyes. With the correct techniques and products, your wrinkles, lines, discolouration and under-eye bags will be neatly covered!
UP NEXT: 10 Makeup Mistakes That Make You Look Old
Hollie xx
About Hollie
Hi, I’m Hollie, and I own BeautywithHollie.com. I love everything to do with beauty and love sharing my knowledge, advice and beauty finds! Makeup and beauty are here to enjoy, and Beauty With Hollie is here to take the stress out of it!
-
CurrentBody Skin Radio Frequency Device Review- Does it Actually Work?
-
Eye Makeup Tips You Need To Try for Sensitive Eyes
-
How To Use Body Lotion and Its Benefits For the Skin
-
How To Apply Mascara Like A Pro- The Best Hacks, Tips & Tricks
-
City Lips Overnight Plumping Lip Oil: My Honest Review and Real Results
-
10 Easy Eye Makeup Tips & Techniques For Older Women Over 60
-
BareMinerals Complexion Rescue Tinted Moisturizer Review- Find Out The Truth
-
The Ultimate Guide to Different Types of Eyeshadows and Their Gorgeous Finishes
-
The Different Types Of Foundation In Makeup And How To Choose The One For You
Anastasia Beverly Hills
bareMinerals
Benefit Cosmetics
Bobbi Brown
CeraVe
Chantecaille
Charlotte Tilbury
Clarins
ColourPop
Dermalogica
Dior
Dyson
e.l.f. Cosmetics
ELEMIS
Estée Lauder
Fenty Beauty
First Aid Beauty
Fresh
Giorgio Armani
Hourglass
Jane Iredale
L’Oreal
Lancome
La Roche-Posay
Laura Mercier
LORAC
MAC
Makeup Revolution
Maybelline
Morphe
Nars
Natasha Denona
Neutrogena
NYX
Origins
Peter Thomas Roth
Revlon
Sigma Beauty
Smashbox
Stila
Tarte Cosmetics
The Ordinary
Too Faced
Urban Decay
YSL
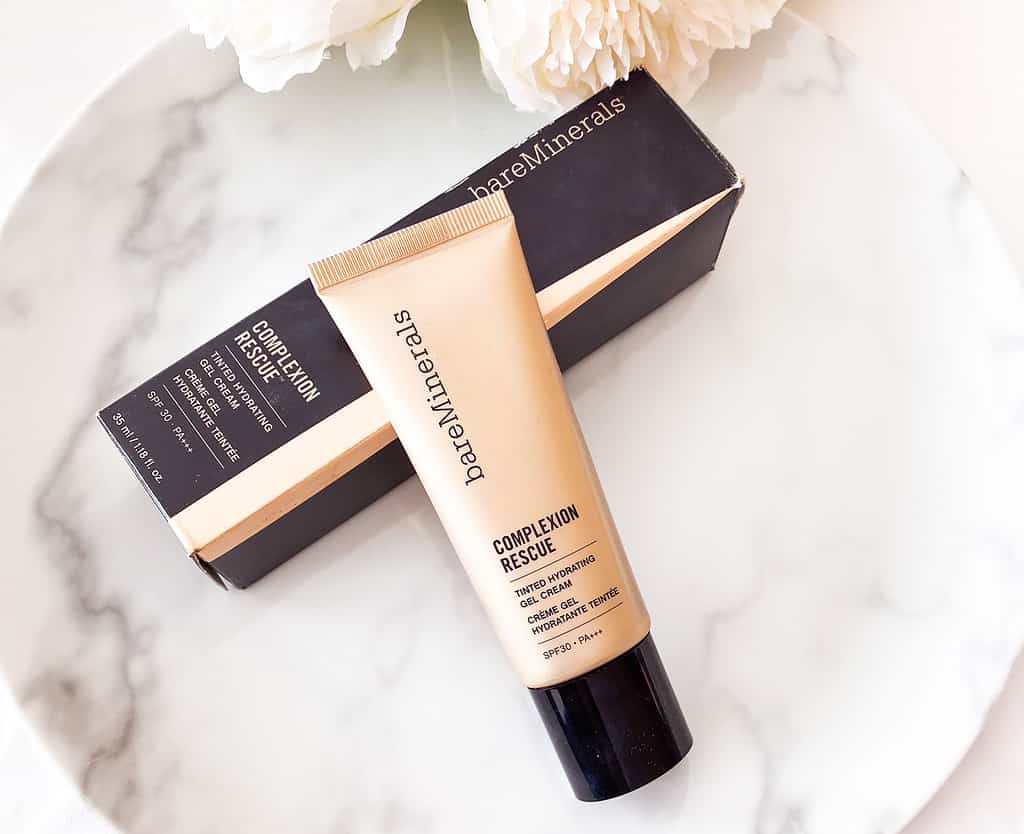
The bareMinerals Complexion Rescue Tinted Hydrating Gel Cream is Named the number 1 tinted moisturizer in the US, so naturally I had to try it out. To be honest, I’d heard and read so much about this tinted moisturizer, I was really excited to try it out!
A tinted moisturizer is a perfect way to get coverage that’s natural looking and that has all the skincare benefits of a moisturizer. I love tinted moisturizers, from how comfortable they are to the no-makeup-makeup look that they give. I had high hopes for the BareMinerals Tinted Moisturizer, but did it live up to its hype? Read on to find out…
What is the Complexion Rescue Tinted Moisturizer Mineral SPF 30?
| Active Ingredients: | Hyaluronic acid, squalane, mineral-based sunscreen, titanium dioxide |
| Scent: | Fragrance-free |
| Shades: | 20 |
| Cruelty-Free & Clean: | Yes |
| Price: | $33 USD / £32.50 for 1.18 fl oz |
The Complexion Rescue Tinted Moisturizer is a 3 in 1 multi-tasker moisturizer, skin tint and SPF 30. Made with Hyaluronic Acid, it boosts hydration and is ideal for dry to combination skin.
My Honest Review of the Bare Minerals Tinted Moisturizer

Before we get into the actual review of the tinted moisturizer, let me talk a bit about my skin. Until I hit my 30s, I had an oily to combination skin type that was prone to breakouts. Once I turned 30, I noticed a drastic change in my skin, it became a lot drier so I started opting for more hydrating products, one of them being tinted moisturizers.
My skin has never been particularly sensitive, most skincare products and makeup work well and don’t cause breakouts, so while I’m careful to choose good products, I’m not overly cautious.

The Complexion Rescue Tinted Moisturizer fit the bill in all the ways I wanted. It has the most gorgeous texture that’s lightweight and easy to apply. It has a dewy finish that I fell in love with and it gives the skin a healthy glow while not looking shiny.
I bought the shade Opal 01, which is the palest shade. It’s perfect for my pale skin!
It applies smoothly and easily, blurring my imperfections and open pores. The tinted moisturizer lasts perfectly the whole day, although I did apply setting powder on top of it. But despite that, it still lasted better than other tinted moisturizers and foundations of mine. And to top it off, it has SPF30!

So all-in-all, I thought I had found the perfect tinted moisturizer for my skin. Or had I?
After using the Complexion Rescue Tinted Moisturizer for 3-4 days, I noticed breakouts and these weren’t the normal type of breakouts that I usually get. Different in texture and appearing in different places that I usually break out.
After cancelling out every possible reason, the only one left was that the BareMinerals Tinted Moisturizer was causing breakouts. But how could it cause breakouts when it’s dermatologist-tested and non-comedogenic? Non-comedogenic means that it doesn’t clog pores so I’m still questioning that. But, digging into the ingredients, I noticed that the third ingredient is Coconut Alkanes.
Similar to coconut oil, it’s actually extremely comedogenic and is prone to clogging pores and causing breakouts. Bingo, I found the cause of why the Complexion Rescue was causing my face to break out. Read more about why coconut oil is not recommended for your face.
I don’t have acne-prone skin or particularly sensitive skin so I am really surprised that the tinted moisturizer doesn’t work for me. Especially when most of the reviews are really positive and barely anyone mentions that it can clog pores. While it may work for some skin types, there are loads of tinted moisturizers, like the Armani Neo Nude that are made with better ingredients that don’t clog the pores.
Pros and Cons of the Complexion Rescue Tinted Moisturizer
Pros
- Gives 24-hour hydration
- Dewy glowy finish
- SPF 30
- Blurs imperfections
- Lightweight
- Blends well
Cons
- Contains coconut alkanes which is prone to clogging pores
BareMinerals Complexion Rescue Ingredients

Active: Titanium Dioxide 6.2%. Inactive: Water, Coconut Alkanes, Propanediol, Squalane, Trehalose, Isostearic Acid, Glycerin, Silica, Agar, Caprylic/Capric Triglyceride, Globularia Cordifolia Callus Culture Extract, Salicornia Herbacea Extract, Melilotus Officinalis Extract, Coco-Caprylate/Caprate, Butylene Glycol, Lauroyl Lysine, Sodium Hyaluronate, Succinoglycan, Polysorbate 60, Cellulose Gum, Polyglyceryl-4 Laurate/Succinate, Sorbitan Sesquiisostearate, Magnesium Stearate, Magnesium Hydroxide, Magnesium Chloride, Potassium Chloride, Calcium Chloride, Potassium Sorbate, Phenoxyethanol. May Contain: Titanium Dioxide, Iron Oxides.
After reaching out to bareMinerals and asking how they label the Complexion Rescue as non-comedogenic when it has the ingredient Coconut Alkanes that’s known to clog pores, they told me they can’t disclose or release this kind of information. Not the most helpful response, to say the least.
Products I Recommend
Common FAQs
My Thoughts
While I love so many features of the BareMinerals Complexion Rescue Tinted Moisturizer, like the coverage, the texture and the color, the fact that it’s labelled as non-comedogenic, when in fact it contains an ingredient that is known to clog pores baffles me.
Do I recommend buying it? If it works for you that’s great, but buying a product that’s expensive and then realising it’s not for you, is extremely frustrating. There are loads of tinted moisturizers that don’t clog the pores, so I recommend checking them out and saving yourself the possible hassle and disappointment!
Recommended alternatives:
- Rare Beauty NEW Positive Light Tinted Moisturizer SPF 20
- Armani Neo Nude Tinted Moisturizer Review
- Urban Decay Stay Naked Hydromaniac Tinted Glow Hydrator Review
Hollie xx
About Hollie
Hi, I’m Hollie, and I own BeautywithHollie.com. I love everything to do with beauty and love sharing my knowledge, advice and beauty finds! Makeup and beauty are here to enjoy, and Beauty With Hollie is here to take the stress out of it!
-
Eye Makeup Tips You Need To Try for Sensitive Eyes
-
How To Apply Mascara Like A Pro- The Best Hacks, Tips & Tricks
-
10 Easy Eye Makeup Tips & Techniques For Older Women Over 60
-
BareMinerals Complexion Rescue Tinted Moisturizer Review- Find Out The Truth
-
The Ultimate Guide to Different Types of Eyeshadows and Their Gorgeous Finishes
-
The Different Types Of Foundation In Makeup And How To Choose The One For You
-

Contouring for Beginners: A Step-by-Step Guide on How to Contour Like a Pro
-

Setting Powder vs Setting Spray: When and How To Use Them
-

New Urban Decay Hydromaniac Dewy Liquid Blush Review
Anastasia Beverly Hills
bareMinerals
Benefit Cosmetics
Bobbi Brown
CeraVe
Chantecaille
Charlotte Tilbury
Clarins
ColourPop
Dermalogica
Dior
Dyson
e.l.f. Cosmetics
ELEMIS
Estée Lauder
Fenty Beauty
First Aid Beauty
Fresh
Giorgio Armani
Hourglass
Jane Iredale
L’Oreal
Lancome
La Roche-Posay
Laura Mercier
LORAC
MAC
Makeup Revolution
Maybelline
Morphe
Nars
Natasha Denona
Neutrogena
NYX
Origins
Peter Thomas Roth
Revlon
Sigma Beauty
Smashbox
Stila
Tarte Cosmetics
The Ordinary
Too Faced
Urban Decay
YSL
]]>
Like all makeup products, the choice of eyeshadows is endless. With so many types of eyeshadows as well as all the different finishes, knowing what to buy can be confusing.
I have always been a fan of eyeshadow, it’s a really fun and creative way to add color and character to your face. Choosing the right eyeshadow doesn’t need to be hard or complicated.
That’s why I’ve put together this guide on all the different eyeshadow types, and the different types of eyeshadow finishes. Choosing the right eyeshadow for you and your skin will be easy!
Compact Powder Eyeshadow

The most common type of eyeshadow is compact powder. Looking back at history, it was probably also the first. The first recordings of eyeshadow are from the ancient Egyptians, who made kohl as well as colored eyeshadow from rocks and minerals.
Powder eyeshadow has come a long way since then. Available in endless shades, from neutral to smokey and pastel to bright. You can buy them individually or in a palette. Powder eyeshadows are my personal favorite because there’s so much choice, and I simply love a gorgeous eyeshadow palette!
Pros and Cons of Powder Eyeshadow
Pros
- Easy to apply & blend
- Endless color options
- Buildable
- Longlasting
Cons
- There’s often fallout
- Can be drying on the skin
Who is a power for?
Compact powder eyeshadow is ideal for anyone and everyone but, it’s particularly great for beginners to eyeshadow because of how easy it is to use. Since powder eyeshadows are so versatile, there are loads available for sensitive eyes too.
Loose Powder Eyeshadow
Loose powder eyeshadow is the same as powder eyeshadow, only not pressed, resulting in a loose, finely milled powder consistency. Available in a wide range of shades and finishes, including matte, shimmer, satin, metallic, and glitter. They are most loved for their dazzling capabilities.
Use a small blending brush to apply the loose powder. Dip the brush in and tap off the excess to control how much you apply. For an even more intense pigmentation, wet your brush slightly before using it, or spray it with setting spray.
Loose glitter eyeshadow also falls under the loose powder category, but it needs to be applied slightly differently. Since the texture is loose, you can’t apply it straight to the eyes, you need to apply eye primer first so that the glitter has something to stick to.
Pros and Cons of Loose Powder Eyeshadow
Pros
- Intense pigmentation
- Easy to blend
- Customizable application
- Range of finishes
Cons
- Fallout is common when applying
- Messy packaging
- Requires practice
Who is a loose powder for?
One of the biggest drawbacks of loose powder eyeshadow is that it’s messy to apply and takes time and skill to perfect your technique. While it’s not hard to master, it requires patience and time! Loose powder eyeshadow is for those who love intense pigmentation and love being creative.
Pro tip: Always apply your loose eyeshadow before your base makeup so you can clean up the fallout without ruining the rest of your makeup. Get more eyeshadow tips here.
Cream Eyeshadow
The second most common type of eyeshadow after powder is cream eyeshadow. It comes in a variety of packaging including pots, sticks, tubes and pencils. With a creamy texture, it’s easy to apply and easy to blend. Use your fingers or a brush to get a fabulous eye look. The color is often richer and less dull than powder eyeshadows. Also, cream eyeshadows are often made from hydrating ingredients.
Pros and Cons of Cream Eyeshadow
Pros
- Non-drying
- Smooth and blendable
- Long-wearing
- Quick and easy to apply
- No fallout
Cons
- Limited precision
- Prone to creasing
- It can be hard to build up
Who is a cream for?
Cream eyeshadow is best for those with dry skin. Unlike powder eyeshadows, cream ones don’t dry out the eyelids or cause itchiness. Cream eyeshadow is also ideal for aging and mature skin because it doesn’t settle into lines and wrinkles, creating a smoother more seamless finish.
Liquid Eyeshadow

Liquid eyeshadow has the ideal balance of cream and powder when it comes to texture. It isn’t as thick as a cream eyeshadow, yet is smoother and easy to apply than powder eyeshadow. Apply it with the doe-foot applicator that it comes with and blend it out with your fingers or brush.
One of my favorite liquid eyeshadows is the Stila Magnificent Metals. They’re intensely pigmented, easy to use and have stunning shades!
Pros and Cons of Liquid Eyeshadow
Pros
- Non-drying
- Blends easily
- No fallout
- Dries quickly
Cons
- Liquid can be hard to control
- Prone to smudging and creasing
Who is liquid for?
Liquid eyeshadow is similar to cream eyeshadow in the way that it’s ideal for dry and mature skin since it doesn’t dry out the skin, nor does it settle into lines or make them appear larger. That being said, liquid eyeshadow isn’t really suitable for oily eyelids as it makes them oilier.
Stick Eyeshadow
Stick eyeshadow is similar to cream eyeshadow in texture, although not quite the same. Eyeshadow sticks are often made from wax-based formulas giving them the stick shape and a less creamy consistency than cream shadows. But that’s not all the wax-based formula does, it also helps the eyeshadows stick to the eyes making them less prone to creasing than cream eyeshadows.
Easy to apply, swipe it on the eyes and blend it with a brush or fingers. Eyeshadows sticks are extremely convenient to apply and perfect for keeping in your purse for a quick touch-up.
Pros and Cons of Stick Eyeshadow
Pros
- Easy to apply
- Convenient
- Ideal for travelling
- Buildable
- Mess-free
- Longlasting
Cons
- Limited shade range
- Not as easy to blend as other eyeshadows
- Not good for detailed looks
Who is stick shadow for?
Eyeshadow sticks are perfect for anyone who likes quick and convenient makeup. It’s one of the easiest types of eyeshadow to apply, it’s mess-free and hard to get wrong. They’re perfect for beginners to make-up as well as makeup pros. Oily skin may find the stick formula too creamy for them.
Gel Eyeshadow
Gel eyeshadow isn’t so well known, for the main reason that the choice available is very limited. Another reason is that some gel eyeshadows are called liquids, probably because they are better known! Most gel eyeshadows come in a shimmer or glitter finish.
Gel eyeshadow has a thicker consistency than liquid eyeshadow, but thinner than cream eyeshadow. The gel formula is lightweight and cool on the lids. It blends more like a liquid, is easy to use and has amazing staying powers. Apply with your fingers or brush.
Pros and Cons of Gel Eyeshadow
Pros
- Easy to apply
- Rich color payoff
- Can be used as eyeliner
- Longlasting
- Dry quickly
- Usually oil-free
Cons
- Limited shade range
- Can take time to get the hang of
Who is gel for?
Gel eyeshadow is a great choice for those with oily eyelids who want more of a creamy consistency. The creamy texture adheres to the skin, making it more resistant to the natural oils on the eyelids. Gel also works incredibly well for combination skin.
Baked Eyeshadow
Baked eyeshadow is exactly as it sounds, it’s baked. The reason it gets baked is because it’s made with oils and other liquids to create a paste. Baking gives it a powder texture, giving you the benefits of power and cream in one.
Baked eyeshadows usually have a unique dome shape which is the baked trademark look. While it applies smoother than the traditional powders, it’s also less pigmented. Apply it wet for a more intense look.
Pros and Cons of Baked Eyeshadow
Pros
- Can be applied wet or dry
- Easy to apply and blend
- Versatile
- Soft and smooth texture
Cons
- Fragile texture
- Outer layer is often hard
- Can be more work when using wet
Who is baked shadow for?
Using baked eyeshadow dry is ideal for beginners. Its biggest selling point is how smoothly and easily it blends, all without the shades being overpowering. Using it wet can be a bit trickier so I don’t recommend it for those just starting out.
The Different Types of Finishes
Matte

Almost every makeup look starts with a matte base which is a flat, non-shimmering shade. Most eyeshadow palettes come with at least one or two matte shades because they are a staple. You can also get entire palettes of only matte shades, like the ColourPop Matte About Hue. Matte finishes are usually highly pigmented and come in all shades. Due to their lack of shimmer and glitter pigments, mattes are easy and soft to blend.
Satin
If you want a bit of shimmer while still keeping your makeup sophisticated, a satin finish is what you need! The finish is in between a matte and shimmer, giving your eyes a radiant, luminous glow.
Shimmer
If you’re looking for more shimmer than a satin finish gives, the next level up is shimmer eyeshadows. They contain fine, light-reflecting particles that are easy to blend giving your eyes a luminous, shimmery effect. A gorgeous palette full of stunning shimmers is the Natasha Denona Bronze Eyeshadow Palette.
Glitter

A glitter finish is one step up from shimmers. They contain larger, more prominent glitter particles, creating a bold and dazzling effect on the eyelids. Glitter eyeshadow comes in a range of textures from finer ones to chunkier ones. The chunkier the texture, the harder they are to apply but, you get more sparkle and shine too. One thing to be aware of is that there is often more fallout with glitters, so use a primer or glitter glue to prevent it.
Metallic
A metallic finish is another high-shine, sparkly finish, but, it’s different to glitters and shimmers because it’s designed to mimic the appearance of metals, such as gold, silver, bronze, or copper. Metallic shades are usually creamy and easy to apply with fine, highly reflective particles. Get luxury to affordable metallic finishes with these eyeshadow dupes.
My Thoughts
Eyeshadows have come a long way in the last decade. With so many types and finishes, there’s something for everyone. And there’s something for every budget too, including amazing cheap palettes!
Hollie xx
About Hollie
Hi, I’m Hollie, and I own BeautywithHollie.com. I love everything to do with beauty and love sharing my knowledge, advice, and beauty finds! Makeup and beauty are here to enjoy, and Beauty With Hollie is here to take the stress out of it!
-
CurrentBody Skin Radio Frequency Device Review- Does it Actually Work?
-
Eye Makeup Tips You Need To Try for Sensitive Eyes
-
How To Use Body Lotion and Its Benefits For the Skin
-
How To Apply Mascara Like A Pro- The Best Hacks, Tips & Tricks
-
City Lips Overnight Plumping Lip Oil: My Honest Review and Real Results
-
10 Easy Eye Makeup Tips & Techniques For Older Women Over 60
-
BareMinerals Complexion Rescue Tinted Moisturizer Review- Find Out The Truth
-
The Ultimate Guide to Different Types of Eyeshadows and Their Gorgeous Finishes
-
The Different Types Of Foundation In Makeup And How To Choose The One For You
Anastasia Beverly Hills
bareMinerals
Benefit Cosmetics
Bobbi Brown
CeraVe
Chantecaille
Charlotte Tilbury
Clarins
ColourPop
Dermalogica
Dior
Dyson
e.l.f. Cosmetics
ELEMIS
Estée Lauder
Fenty Beauty
First Aid Beauty
Fresh
Giorgio Armani
Hourglass
Jane Iredale
L’Oreal
Lancome
La Roche-Posay
Laura Mercier
LORAC
MAC
Makeup Revolution
Maybelline
Morphe
Nars
Natasha Denona
Neutrogena
NYX
Origins
Peter Thomas Roth
Revlon
Sigma Beauty
Smashbox
Stila
Tarte Cosmetics
The Ordinary
Too Faced
Urban Decay
YSL
]]>
Welcome to the world of base makeup, where the foundation reigns supreme. Whether you opt for a lightweight tinted moisturizer or a high-coverage foundation, they all fall under the foundation category.
As a makeup enthusiast myself, I vividly recall the confusion I experienced when confronted with the myriad types of foundations. Determining the ideal foundation for your skin type, navigating through the options, and selecting the one with optimal staying power can be overwhelming.
But fear not! In this comprehensive guide, I will unravel the mysteries of each foundation type, providing detailed explanations and answering all your burning questions like- Which foundation is best for which skin type? How to choose between all the different types of foundations? Which has the best-staying power? Get ready to discover the perfect foundation match that will enhance your beauty and leave you feeling confident and flawless.
Liquid Foundation
Liquid foundation is a pigmented liquid, most often water-based. It comes in all types of finishes as well as all coverages and is the most widely used foundation with the most choice available. From drugstore foundations to luxury ones, there’s a foundation for everyone.
Liquid foundation is a beginner-friendly type of foundation, known for its effortless application and seamless bendability. It can be applied with a brush, beauty blender, or even your fingertips, making it highly versatile. This makes it an ideal choice for those new to makeup, as it is difficult to go wrong with its application.
What are the benefits of a liquid foundation?
Liquid foundation is great for evening out your skin tone and ideal for getting a flawless finish. It fills in open pores, covers lines and wrinkles without settling in them and is buildable. It’s also the best type of foundation for full coverage and long-lasting makeup.
What skin type is liquid foundation best for?
Nowadays with so many amazing foundation formulas, every skin type can benefit from every foundation. However, that being said, those with dry skin can benefit a lot from a liquid foundation which usually has a non-drying, hydrating formula.
Pros and Cons of Liquid Foundation
Pros
- Easy to apply
- Buildable
- Non-drying
- Great choice of shades
- Best for long-lasting
- Best for full-coverage
Cons
- Can look shiny
- If applied wrong can look cakey
- Can oxidize
Powder Foundation
Powder foundation comes in two formulas, pressed powder and loose powder. The pressed powder has a more dense coverage, whereas the loose powder is more lightweight.

Powder foundation is easy to blend into the skin, but you need to use the correct tools. Use a kabuki brush or beauty blender for seamless and smooth application.
What are the benefits of powder foundation?
The benefit of powder foundation is that it doesn’t get oily, shiny or oxidize over the day. The disadvantages of a liquid foundation are the advantages of a powder foundation. While it’s most commonly recommended for those with oily skin, powder foundation can be suitable for normal to dry skin, provided you use a hydrating moisturizer before.
What skin type is powder foundation best for?
Powder foundation is best for oily and acne-prone skin. It’s also great for the heat, if you’re prone to sweating in the summer, you’ll love a powder foundation to keep your skin oil-free throughout the day.
Pros and Cons of Powder Foundation
Pros
- Absorbs excess oil
- Unlikely to clog pores
- Ideal for the summer
- Good for a matte finish
- Blurring effects
- Buildable
Cons
- Can be hard to apply
- Can look patchy
- Often poor range of shades
- May not cover bad acne or scars properly
Cream Foundation
Cream foundation is a type of foundation in makeup that has a creamy consistency and texture. It is formulated with a higher oil content compared to other types of foundation, giving it a thicker and more emollient texture.
What are the benefits of cream foundation?
Cream foundation is the perfect marriage of liquid and powder foundations. It combines some of the qualities of both making it a very popular foundation choice.
The cream foundation has a natural finish that’s easy to apply and blend, similar to a liquid foundation. It’s similar to a powder foundation in the way that it’s got a denser texture and is layerable and buildable. Cream foundations come in both matte and satin finishes.
What skin type is mineral foundation best for?
Since cream foundations are usually oil-based, they are often recommended for dry, sensitive and mature skin types who want medium to full coverage. Cream foundation stops the skin from drying out and giving a patchy finish. The CoverGirl + Olay Simply Ageless Foundation is a great cream foundation, which features in my review the best foundations for aging skin.
Pros and Cons of Cream Foundation
Pros
- Moisturizing & hydrating
- Buildable
- Smooth finish
- Long-lasting
- Good for a dewy finish
Cons
- Can look too heavy if applied incorrectly
- Too oily for oily and acne-prone skin
Stick Foundation
Stick foundations are essentially the same as cream foundations, just in a stick format. What I love about a stick foundation is how easy it is to apply.
What are the benefits of a stick foundation?
The main benefit of a stick foundation is that it’s so easy and effortless to use. Ideal for travelling with, or even keeping in your purse for a quick touch-up when you’re out and about.
What skin type is stick foundation best for?
Since the formula of a stick foundation is the same as a cream foundation, stick foundations are also ideal for dry and aging skin. This is mainly due to the rich and creamy formula that doesn’t dry out the skin. Just be aware when using a stick foundation that a lot more product applies to the skin with a stick than when using a cream foundation in a tub. Make sure to blend, blend and blend. A stick foundation is a perfect foundation for getting full coverage for dry, aging and mature skin.
Pros and Cons of Stick Foundation
Pros
- Easy to apply
- Smooth application
- Can double as a concealer
- Highly pigmented
Cons
- Pricey for the amount you get
- Sometimes applies too thick
Cushion Foundation
Cushion foundation is a lesser-known type of foundation, and to be honest, there isn’t a huge choice of them on the market. Originally only available on the Korean market, there are becoming more available in the West.
Cushion foundation is pretty much the same as liquid foundation, only in more convenient packaging. The foundation is hidden under a cushion, using a sponge you press down on the cushion to get the foundation.
What makes cushion foundation really popular is that it’s mess-free and is easier to carry around. That being said the coverage is more sheer to medium coverage than full coverage. Don’t expect the full coverage from a cushion foundation that a liquid foundation gives you.
What are the benefits of a cushion foundation?
Aside from cushion foundations being more portable, you’re also less likely to waste any product with a cushion and it looks more natural on the skin. Easy to apply, easy to blend, it’s easy to see why its popularity is on the rise!
What skin type is cushion foundation best for?
All skin types can benefit from a cushion foundation, especially dry and aging skin because the soft texture doesn’t dry out the skin.
Pros and Cons of Cushion Foundation
Pros
- Absorbs excess oil
- Unlikely to clog pores
- Travel-friendly
- Creamy texture
- Blendable
- Mess-free
Cons
- Not high coverage
- Is often pricier than other foundations
Mineral Foundation
Mineral foundation is one of the most confusing foundation types out there. Loose powder foundation is often mistaken for mineral foundation, but actually, they’re 2 different types of foundation.
Mineral foundation is always lightweight with finely ground powders. One of the most well-known mineral foundations is the BareMinerals Original SPF 15 Powder Foundation.
What are the benefits of mineral foundation?
Mineral foundations are loaded with skincare ingredients and benefits as well as SPF. Lightweight and comfortable to wear, they give the skin a flawless finish.
What skin type is mineral foundation best for?
Mineral foundations usually have skincare ingredients, making them the ideal choice for sensitive and problematic skin. There are mineral foundations that help mattify the skin making them perfect for oily skin, and there are mineral foundations that help give brighten the skin giving it an extra glow, perfect for aging and mature skin.
Pros and Cons of Mineral Foundation
Pros
- Never cakes
- Comfortable
- Skincare benefits
- Made with SPF
- Non-irritating
Cons
- It can be messy to apply
Tinted Moisturizer
Tinted moisturizers are one of my favorite types of face coverage because although it’s not really a foundation, it fits into the foundation category. With the no-makeup-makeup look all the rage at the moment, a tinted moisturizer is the perfect way to get that look.

But what exactly is a tinted moisturizer? A tinted moisturizer is exactly as it sounds. It’s a moisturizer that has pigment in it, it moisturizes your skin with the added benefit of beautiful coverage. Easy to apply, you can use a beauty blender, brush or my favorite way- your fingers!
Tinted moisturizers are usually sheer to medium coverage with a very natural-looking finish. That being said, you can get hybrid liquid foundations that have moisturizing ingredients that give fuller coverage, like the ColourPop Pretty Fresh Foundation.
What are the benefits of tinted moisturizer?
The benefit of tinted moisturizer is that you get coverage and moisturized skin in one product. It gives natural-looking coverage with skincare benefits.
What skin type is tinted moisturizer best for?
A tinted moisturizer is best for aging, mature and dry skin. Due to its skincare benefits, it gives a second-skin finish and doesn’t settle into lines and wrinkles or cause dryness. However, it can work for all skin types because everyone needs moisturized skin.
Pros and Cons of Tinted Moisturizer
Pros
- Has skincare ingredients
- Natural finish
- Doesn’t dry out the skin
- Moisturizing
Cons
- Doesn’t give full coverage
CC Cream
CC cream stands for color correcting or complexion corrector. It neutralizes imperfections by using the opposite color in the color wheel. Instead of you using color-correcting makeup like concealer and foundation, a CC cream does it all for you. Use a beauty blender or brush to apply your CC cream.
What are the benefits of CC cream?
A CC cream improves dull skin and helps to even out the skin tone. It helps give the skin a flawless base to apply your makeup on. CC cream is usually more lightweight in texture compared to traditional foundations making them more comfortable to wear.
What skin type is CC cream best for?
Suitable for all skin types, CC creams are best for those with imperfections like hyperpigmentation, redness and dark circles. However, CC creams are usually oil-based which isn’t ideal for oily-prone skin.
Pros and Cons of CC Cream
Pros
- Color corrects
- Skincare ingredients
- Multi-purpose makeup
- Usually contains SPF
Cons
- Not usually full coverage
- Limited shade ranges
BB Cream
BB cream stands for beauty balm or blemish balm. It’s kind of similar to a tinted moisturizer, only does more than just moisturizing. It’s a 3 in 1 product that acts as a primer, moisturizer and foundation.
What are the benefits of BB cream?
The benefit of a BB cream is that you get an all-in-1 product for 3 tasks! Ideal for those who are always in a rush, as well as those who prefer quick makeup routines. Easily confused with a CC cream, a BB cream is lighter in texture and provides more skincare benefits as opposed to the color correcting of a CC cream.
What skin type is BB cream best for?
BB cream is most suitable for dry, normal, mature and combination skin. Those with oily skin may find that a foundation with oil control and a more mattifying base will better suit their needs.
Pros and Cons of BB Cream
Pros
- Lightweight coverage
- Multi-tasking product
- Skincare benefits
- Usually contains SPF
- Natural finish
Cons
- Not full-coverage
- Limited shade range
- Limited oil control
Other Factors To Consider Before Choosing Your Foundation
Now that we’ve covered all the different types of foundation and face coverage, you should have a better understanding of what type of base makeup you want. However, there are a few more factors to consider.
Coverage
Within each foundation type, you can get different levels of coverage. Depending on your skin type and needs will determine which type of coverage you should get.
For a no-makeup-makeup look, look for a base with sheer to medium coverage. For long-lasting makeup, you should opt for medium to full coverage. Another factor to think about is your skin type. Aging and mature skin generally look better with lighter coverage, whereas oily skin may do better with fuller coverage.
Finish
The finish of your foundation is another really important factor to consider before buying a foundation. Do you like your makeup matte, dewy, satin or natural?
Longevity
Lastly, you need to think about how long you want your base makeup to last for. If you have a long day out you may want a longwearing foundation, on the other hand for day to day wear, you may not need that.
My Thoughts On the Different Types of Foundations
Whether you’re new to makeup or not, base makeup can be confusing. There are so many different types of foundations and base coverages available it can make your head spin!
I hope this clarifies some of the confusion surrounding foundation categories in base makeup. It’s important to note that not all base makeup products fit neatly into a specific foundation category. There is often overlap, for example- between powder foundations and setting powders, tinted moisturizers, and BB and CC creams. The beauty industry offers numerous hybrid foundations, like the Kosas Revealer Skin-Improving Foundation.
Gaining a solid understanding of the main foundation types and their functions will help minimize confusion and make informed choices.
Hollie xx
About Hollie
Hi, I’m Hollie, and I own BeautywithHollie.com. I love everything to do with beauty and love sharing my knowledge, advice, and beauty finds! Makeup and beauty are here to enjoy, and Beauty With Hollie is here to take the stress out of it!
-
CurrentBody Skin Radio Frequency Device Review- Does it Actually Work?
-
Eye Makeup Tips You Need To Try for Sensitive Eyes
-
How To Use Body Lotion and Its Benefits For the Skin
-
How To Apply Mascara Like A Pro- The Best Hacks, Tips & Tricks
-
City Lips Overnight Plumping Lip Oil: My Honest Review and Real Results
-
10 Easy Eye Makeup Tips & Techniques For Older Women Over 60
-
BareMinerals Complexion Rescue Tinted Moisturizer Review- Find Out The Truth
-
The Ultimate Guide to Different Types of Eyeshadows and Their Gorgeous Finishes
-
The Different Types Of Foundation In Makeup And How To Choose The One For You
Anastasia Beverly Hills
bareMinerals
Benefit Cosmetics
Bobbi Brown
CeraVe
Chantecaille
Charlotte Tilbury
Clarins
ColourPop
Dermalogica
Dior
Dyson
e.l.f. Cosmetics
ELEMIS
Estée Lauder
Fenty Beauty
First Aid Beauty
Fresh
Giorgio Armani
Hourglass
Jane Iredale
L’Oreal
Lancome
La Roche-Posay
Laura Mercier
LORAC
MAC
Makeup Revolution
Maybelline
Morphe
Nars
Natasha Denona
Neutrogena
NYX
Origins
Peter Thomas Roth
Revlon
Sigma Beauty
Smashbox
Stila
Tarte Cosmetics
The Ordinary
Too Faced
Urban Decay
YSL
Contouring in makeup is one of my favourite ways to create a definition on my face in a natural way. I’ve been using this method daily for the last few years and I love it!
Whether you’re preparing for a special occasion or simply want to enhance your everyday makeup routine, contouring upgrades every look! This contouring guide for beginners provides you with easy and fundamental steps to achieve stunning, sculpted features along with all your contouring questions answered.
What is Contouring
Before diving into how to contour, you need to understand what contouring actually is. Contouring involves using different shades of makeup to create shadows and highlights, strategically sculpting the face giving depth and attention to the areas you want! You do this by choosing shades a bit darker or lighter than your skin tone.
If it sounds complicated, let me reassure you, it’s anything but that! Once you learn where to contour your face, it couldn’t be easier!
Essential Makeup Products for Effective Contouring

There are 2 main types of contouring products in makeup. Powder contour and cream/liquid contours. While there are no strict rules, powders generally work better on oily and combination skin, whereas creams and liquids work better on dry skin.
Contouring is extremely versatile, and you can also opt for foundation or concealer a shade or two darker than your skin. Aside from a contour, you’ll also need a beauty blender or contour brush to blend in your contour.
How To Contour and Highlight-Step by Step Tutorials
Preparing Your Face to Contour
As with all makeup routines, make sure to start off with a cleansed and moisturized face. If you’re applying foundation, apply it next along with concealer. I say ‘if’ because contour can be worn alone, without foundation.
Identifying Your Face Shape
Understanding your face shape is crucial for targeted contouring. Common face shapes include oval, round, square, heart, and diamond. Each shape requires specific contouring techniques to achieve a balanced and flattering look.
How to Contour
Using a contour product a few shades darker than your skin, apply it to the hollow of your cheeks, along the hairline and under the jawline. If your neck is lighter than your face bring the contour down to tone it all in. My favorite contour that I use every day at the moment is the Charlotte Tilbury Fimstar Bronze & Glow.
As you can see from the diagram, contouring for each face shape differs slightly. But the main trick in contouring is to figure out where your cheekbones are and create a definition there.

How to highlight
Apply highlighter, concealer or foundation a shade or two lighter than your skin color. Apply it to the high points of your face, like the centre of your forehead, above your cheekbones, down the bridge of your nose and on the centre of your chin. I’m really enjoying the Elf Halo Glow Filter and the Iconic London Illuminator Drops!
Below is a video on how to apply cream contour which I found very useful!
Blending and Setting the Contour
Blending your contour is super important for that sculpted flawless finish. So make sure you blend, blend and blend some more. Using a damp beauty blender is one of the best ways to get seamless contour, but a brush works well too. Make sure there are no harsh lines, or really any lines at all.
One of the most common mistakes with contouring is not blending the jawline properly, simply because it’s harder to see, so give your jaw some extra blending!
To set your contour for long-lasting makeup, opt for a setting powder or a setting spray.
Common Contour Application FAQs for Beginners
Contour Products I Recommend
My Thoughts
I know this step-by-step guide for contouring has a ton of information and it may seem intimidating at first. Start slowly, try it out and you’ll get the hang of it! Contouring is such a beautiful way to add dentition to your face and bring out your best features! So, grab your contour products, explore your face shape, and enjoy the transformative power of contouring! And of course, if you have any questions, feel free to reach out!
Hollie xx
About Hollie
Hi, I’m Hollie, and I own BeautywithHollie.com. I love everything to do with beauty and love sharing my knowledge, advice, and beauty finds! Makeup and beauty are here to enjoy, and Beauty With Hollie is here to take the stress out of it!
-
CurrentBody Skin Radio Frequency Device Review- Does it Actually Work?
-
Eye Makeup Tips You Need To Try for Sensitive Eyes
-
How To Use Body Lotion and Its Benefits For the Skin
-
How To Apply Mascara Like A Pro- The Best Hacks, Tips & Tricks
-
City Lips Overnight Plumping Lip Oil: My Honest Review and Real Results
-
10 Easy Eye Makeup Tips & Techniques For Older Women Over 60
-
BareMinerals Complexion Rescue Tinted Moisturizer Review- Find Out The Truth
-
The Ultimate Guide to Different Types of Eyeshadows and Their Gorgeous Finishes
-
The Different Types Of Foundation In Makeup And How To Choose The One For You
Anastasia Beverly Hills
bareMinerals
Benefit Cosmetics
Bobbi Brown
CeraVe
Chantecaille
Charlotte Tilbury
Clarins
ColourPop
Dermalogica
Dior
Dyson
e.l.f. Cosmetics
ELEMIS
Estée Lauder
Fenty Beauty
First Aid Beauty
Fresh
Giorgio Armani
Hourglass
Jane Iredale
L’Oreal
Lancome
La Roche-Posay
Laura Mercier
LORAC
MAC
Makeup Revolution
Maybelline
Morphe
Nars
Natasha Denona
Neutrogena
NYX
Origins
Peter Thomas Roth
Revlon
Sigma Beauty
Smashbox
Stila
Tarte Cosmetics
The Ordinary
Too Faced
Urban Decay
YSL
]]>
Makeup can be confusing, and I totally get that! Certain makeup products, for example, foundation and blush, are easy to understand their role and how they work. But then there are products like setting powder and setting spray which tend to be more confusing.
Do you need a setting spray and powder? What’s the difference? How to use them? These are a few of the common questions people ask about setting powder and setting spray. I answer all of your setting powder and setting spray questions in this blog post. I’ve also included product recommendations as well as application tips!
What is Setting Powder

Setting powder, also known as translucent powder, face powder and loose powder is a facial powder used to set makeup. Depending on the desired results, it comes in both tinted and non-tinted options. Aside from long-lasting makeup, setting powders help to control shine and give the complexion a flawless, airbrushed finish.
What Is the Difference Between Pressed and Loose Powder?
Setting powder comes in 2 forms: loose powder and pressed powder., but what’s the difference between the two?
According to Glo Skin Beauty, pressed powder is better for precise application and easier to use for beginners in makeup, and for on-the-go. It’s the better option for easy, mess-free touch-ups.
Loose powder is better for a lighter, more flawless finish. It tends to absorb more oil over the day and provides more extended wear. My favourite loose powders are Laura Mercier Translucent Loose Setting Powder and Rodial Glass Powder. Loose powder can also be used for the baking technique in makeup.
How to apply setting powder
Apply setting powder after concealer and foundation, before blush and contour. Make sure to apply the setting powder before your base makeup dries. The wet texture of the foundation and concealer fuse together with the dry setting powder to create a bond that gives you long-lasting makeup.
Setting powder can be applied all over your face to set your makeup. Apply a thin layer and slowly build up to the coverage that you want.
If you have dry skin, opt for one of these finishing powders for dry skin. Also if you have dry skin, a clever setting powder hack is to skip applying powder on the very dry areas. I skip the powder around my nose and stick to the T-zone.
What is Setting Spray
If you’ve bought setting spray and you don’t know why you’ve bought it or how to use it, you’re in the right place! That fine mist, also known as finishing spray that you spritz on your face isn’t to only feel nice and cool, it actually has a vital role in keeping makeup lasting longer. As Loreal says– “The whole purpose of using a makeup finishing spray is to help prevent your makeup from sliding, smudging, creasing, or fading quickly”.
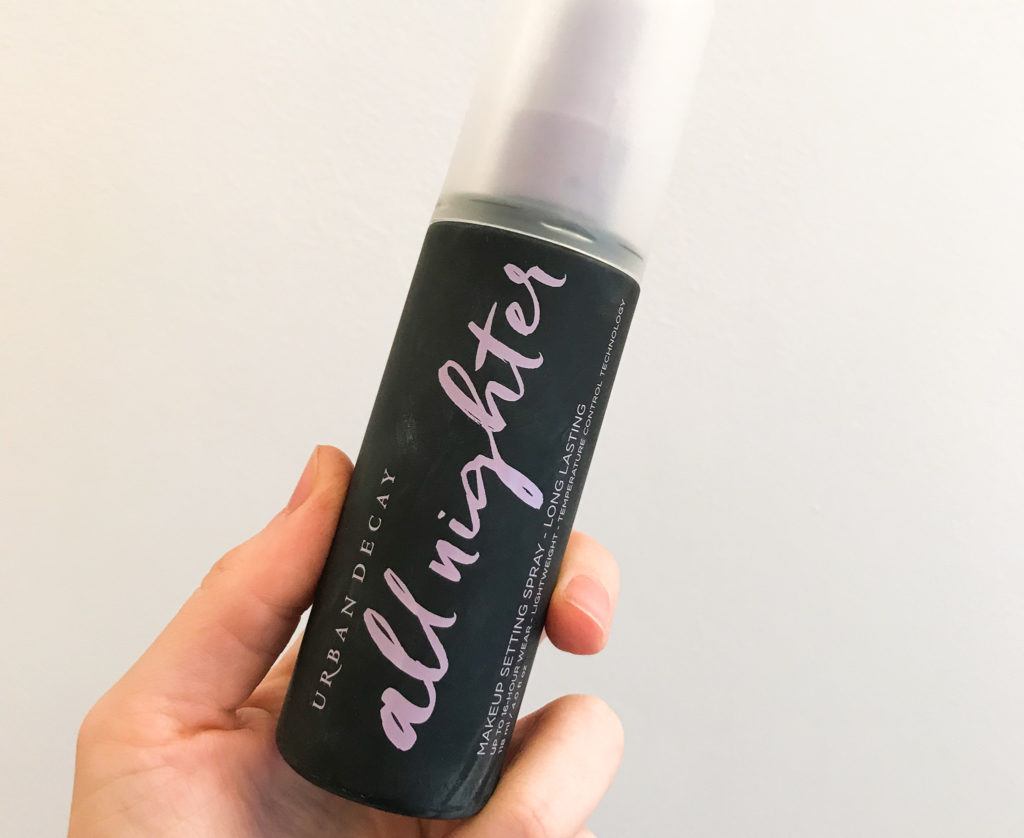
Eventhough the idea of setting spray is to keep your makeup from moving, there are many different setting sprays that have different benefits and target different needs. Some are hydrating, some are mattifying, some are glowing, some have skincare benefits…you get the gist! My personal favorite at the moment is the Urban Decay All Nighter Setting Spray.
For those who are sceptical that a setting spray can really help keep the makeup on longer and better, let me reassure you it makes an absolutely huge difference! Instead of topping up my makeup midday, setting spray keeps it from moving all day. And that includes my mascara and eyeliner on my oily eyelids!
How to Apply Setting Spray
Apply your setting spray as the very last step in your makeup. Shake the spray and hold it about 6-8 inches away from your face and spray all over your makeup. For extra-lasting makeup, repeat the process once the first layer has dried.
What’s the Difference Between Setting Powder and Setting Spray?
Both setting powders and setting sprays have the same goal in mind- to extend the longevity of your makeup. Traditionally, setting powder was designed to help keep shine at bay, hence was more targeted at oily skin and setting spray was designed to be non-drying on the skin, making it more suitable for dry and mature skin.
However, nowadays since there are hydrating setting powders and mattifying setting sprays, any skin type can benefit from both options. It all depends on the finish you are after.
Should You Use a Setting Spray or a Setting Powder?
If you have dry, oily, acne-prone skin, mature skin or open pores, you will probably benefit from a setting powder or setting spray. Choosing between a setting spray and setting powder boils down to your personal preference.
For me, a setting powder is a must because it blurs my open pores and gives me a more flawless finish than a setting spray can achieve. That being said, I also use a setting spray because it keeps the makeup locked in place better than any setting powder can! Yes, you can use both!
My Thoughts
Both setting sprays and setting powders play a vital role in makeup, but they’re not necessities, especially for those who don’t suffer from makeup disappearing, smudging or creasing! While I use both options and can’t live without them, I know friends and family with amazing skin who don’t need either of them, because their makeup lasts all day!
Hollie xx
About Hollie
Hi, I’m Hollie, and I own BeautywithHollie.com. I love everything to do with beauty and love sharing my knowledge, advice, and beauty finds! Makeup and beauty are here to enjoy, and Beauty With Hollie is here to take the stress out of it!
-
CurrentBody Skin Radio Frequency Device Review- Does it Actually Work?
-
Eye Makeup Tips You Need To Try for Sensitive Eyes
-
How To Use Body Lotion and Its Benefits For the Skin
-
How To Apply Mascara Like A Pro- The Best Hacks, Tips & Tricks
-
City Lips Overnight Plumping Lip Oil: My Honest Review and Real Results
-
10 Easy Eye Makeup Tips & Techniques For Older Women Over 60
-
BareMinerals Complexion Rescue Tinted Moisturizer Review- Find Out The Truth
-
The Ultimate Guide to Different Types of Eyeshadows and Their Gorgeous Finishes
-
The Different Types Of Foundation In Makeup And How To Choose The One For You
Anastasia Beverly Hills
bareMinerals
Benefit Cosmetics
Bobbi Brown
CeraVe
Chantecaille
Charlotte Tilbury
Clarins
ColourPop
Dermalogica
Dior
Dyson
e.l.f. Cosmetics
ELEMIS
Estée Lauder
Fenty Beauty
First Aid Beauty
Fresh
Giorgio Armani
Hourglass
Jane Iredale
L’Oreal
Lancome
La Roche-Posay
Laura Mercier
LORAC
MAC
Makeup Revolution
Maybelline
Morphe
Nars
Natasha Denona
Neutrogena
NYX
Origins
Peter Thomas Roth
Revlon
Sigma Beauty
Smashbox
Stila
Tarte Cosmetics
The Ordinary
Too Faced
Urban Decay
YSL
]]>
With so many makeup brands getting in on the liquid blush trend, obviously, Urban Decay had to have a piece of it too! From the Charlotte Tilbury Pillow Talk Blush Wand, to the Rare Beauty Liquid Blush, not one to miss out on the trend, Urban Decay has just announced their new Hydromaniac Dewy Liquid Blush.
While some might yawn at another liquid blush, I’m rather excited. I love the Hydromaniac Tinted Glow Hydrator, and in general, am a fan of most Urban Decay products. Let’s find out what the New Urban Decay Hydromaniac Dewy Liquid Blush is all about!
What is the Urban Decay Hydromaniac Dewy Liquid Blush

Urban Decay Hydromaniac Dewy Liquid Blush is all about giving you long-lasting rosy cheeks with a dewy glow. Whereas many liquid blushes give a subtle pinch of color to the cheeks, the Hydromaniac Dewy Liquid Blush gives more than just a flush. It gives a highly pigmented color that is sheer, yet buildable, blendable, and lasts for up to 24 hours! A little goes a long way.
But that’s not all this blush has to boast about. The vegan formula is infused with skin-loving ingredients to hydrate, nourish and protect your skin as you go about your day!
The main ingredients are:
- kombucha: detoxifies and nourishes the skin
- marula oil: protects and hydrates the skin
Hydromaniac Dewy Liquid Blush Shades

The cheek tints come in 6 highly-pigmented shades that are made for all skin tones, light to dark. While I agree, the blushes look ideal for dark skin tones, I think they’re only suitable for pale skin tones if you like a heavy blush look. But that does make sense since Urban Decay says, these blushes give more than just a flush of color!

- Drippin’ – cool-toned bubblegum pink
- Obsessed – warm, vacation-ready coral peach
- Rebellious – bold & burnt terracotta
- Red Flag – hot, red-orange blush
- Unhinged – saucy berry mauve
- Wrecked – moody dusty rose
How to Apply the Liquid Blush
Liquid blush is so easy to apply and you have much more control over it than a powder blush.
- Using your fingers or a blush brush, apply two dots on each cheek
- Gently pat and blend the tint into the apple of your cheek
You can wear the blush alone or on top of your favourite liquid foundation or tinted moisturizer. Be aware that if you’re using a liquid blush, you need to use a liquid base, you can’t blend a liquid on top of a powder. It simply won’t blend properly.
Is the Urban Decay Hydromaniac Dewy Liquid Blush For You?
If you love a dewy glow to your skin, you’ll love the Hydromaniac Dewy Liquid Blush. There’s a reason why everyone and every brand loves liquid blush at the moment. Aside from liquid blush being easier to apply than powder blush, a liquid blush is less cakey and is so easy to get a natural makeup look with.
Gone are the days when heavy makeup was all we knew. Nowadays, everyone wants a piece of skin-like, natural-looking makeup. But, is a liquid blush for you?
Liquid blush is most suitable for dry, aging and mature skin. Especially one like the Hydromaniac Dewy Liquid Blush which has skincare ingredients in it. A powder blush tends to settle into lines, wrinkles and dry areas giving them more attention than they need, whereas, a liquid blush gets absorbed into the skin becoming one with the skin. If you don’t want to draw attention to these areas, you’ll love a liquid blush!

That being said, for oily skin and for those with enlarged pores, a liquid blush is usually not the best option. Even though the cheek tints are non-non-comedogenic and won’t clog pores, oily skin doesn’t need a blush with a dewy finish, and aside from the finish, a powder sits better and works better with oily skin.
When it comes to enlarged pores, my personal experience is that liquid tints tend to get stuck in the pores creating a finish that’s far from flawless. I’m still trying to figure out a way to make liquid and cream blushes as well as liquid and cream contours work for my skin. So far, I’ve been unsuccessful, but I will keep you posted!
My Thoughts
If you have dry, aging or mature skin, and love an intense flush to your cheeks, the Urban Decay Hydromaniac Dewy Liquid Blush is a great option for you! One thing to be aware of is that it’s on the pricier side, as Urban Decay products usually are. For a more budget-friendly option, check out these cream and liquid blushes.
Urban Decay Hydromaniac Dewy Liquid Blush will be available from May 28th.
UP NEXT: Best Urban Decay Makeup Products of 2023 That Are Worth Every Penny
Hollie xx
About Hollie
Hi, I’m Hollie, and I own BeautywithHollie.com. I love everything to do with beauty and love sharing my knowledge, advice, and beauty finds! Makeup and beauty are here to enjoy, and Beauty With Hollie is here to take the stress out of it!
-
Everything You Need to Know About MAC’s Advent Calendar 2023
-
CurrentBody Skin Radio Frequency Device Review- Does it Work?
-
Eye Makeup Tips You Need To Try for Sensitive Eyes
-
How To Use Body Lotion and Its Benefits For the Skin
-
How To Apply Mascara Like A Pro- The Best Hacks, Tips & Tricks
-
City Lips Overnight Plumping Lip Oil: My Honest Review and Real Results
-
10 Easy Eye Makeup Tips & Techniques For Older Women Over 60
-
BareMinerals Complexion Rescue Tinted Moisturizer Review- Find Out The Truth
-
The Ultimate Guide to Different Types of Eyeshadows and Their Gorgeous Finishes
Anastasia Beverly Hills
bareMinerals
Benefit Cosmetics
Bobbi Brown
CeraVe
Chantecaille
Charlotte Tilbury
Clarins
ColourPop
Dermalogica
Dior
Dyson
e.l.f. Cosmetics
ELEMIS
Estée Lauder
Fenty Beauty
First Aid Beauty
Fresh
Giorgio Armani
Hourglass
Jane Iredale
L’Oreal
Lancome
La Roche-Posay
Laura Mercier
LORAC
MAC
Makeup Revolution
Maybelline
Morphe
Nars
Natasha Denona
Neutrogena
NYX
Origins
Peter Thomas Roth
Revlon
Sigma Beauty
Smashbox
Stila
Tarte Cosmetics
The Ordinary
Too Faced
Urban Decay
YSL
]]>
Anything can be multi-functional, that’s if you’re blessed with the right information! Setting powder, face powder, translucent powder, or whatever else you call it is the perfect example of a makeup product that you can use in multi-functional ways!
I’ve put together some of the best setting powder hacks on how to apply setting powder for long-lasting makeup! Tried and tested, and I can testify that these techniques actually work and help keep makeup intact longer and better!
1. Use face powder to double-prime your eyelids

Whatever your skin type, one thing that is the same for most people is that our eyelids are oilier than the rest of our skin. An eyelid primer like the MAC Prep + Prime helps control grease and keeps your eyeshadow looking as fresh as possible.
For double protection and a great hack, try dusting a generous amount of setting powder on your eyelids right after your eye primer. This helps to soak up any oils and unwanted shine. It also helps the eyeshadow apply easier and smoother. Only do the second step if you’re applying powder eyeshadow. Putting cream eyeshadow on top of powder ones does not work.
2. Set your eyeliner for long-lasting results
Before applying your eyeliner pencil along the upper lash line, makeup artist Pat McGrath recommends dusting loose, translucent powder on the lid first as a base. Finish it with another layer of translucent powder once you are done with the eyeliner application.
“It keeps the pencil from smudging into the crease when you open your eyes,” McGrath says. This trick also works for liquid or gel eyeliners too!
3. Volumize Lashes with your loose powder
To achieve a full-blown eyelash effect without needing to go through more than 5 coats of your mascara, try a layer of setting powder instead.
After your first coat of mascara, lightly dust your face powder on your lashes with a brush; then add another coat of mascara, et voila! You get long and thick-looking eyelashes. Make sure to apply the setting powder coat while your mascara is still wet so the powder pigments stick to it rather than crumble.

I recommend the Laura Mercier Translucent Loose Setting Powder for this tip because firstly, it’s translucent and secondly it’s loose which makes it easier to apply to the lashes. Use a volumizing mascara to get the best from this tip!
4. Sandbagging
If you are unfamiliar with sandbagging, it simply involves coating a generous layer of setting powder under each eye, as close to the lower lash line as possible before you start your eye makeup.
It stops eyeshadow, kohl pencils and mascara from smearing onto your lower lash line. It’s a more modest version of the baking technique. I recommend using the Rodial Glass Powder, it’s one of the best face powders for under the eyes.
5. Baking
Baking in makeup is a popular follow-up step after highlighting and contouring. It’s a technique first used in backstage makeup and in the drag community and went viral a few years ago.
Baking involves coating a liquid foundation, or other cream/liquid face product with a heavy amount of powder. Similar to the sandbagging technique, use a wedged sponge and coat generous layers of loose powder on the highlighted areas.
Don’t be intimidated by the amount of powder or how scary it looks because once you dust it off, it all disappears, all you’re left with is flawless skin! The additional coat of powder helps to seal the consistency of cream underneath it.
This cream and powder combination gives a brighter, more enhanced and smoother finish to the skin.
6. Setting Powder on lipstick
After applying your first coat of lipstick, take a tissue and pull it apart to only one ply. Grab a fluffy brush and dip it into your loose powder. Take the one-ply tissue, place it over your lips and with the other hand, dab the loose powder over the tissue.
An optional step is to press your lips against the tissue to remove any excess lip product and apply the lipstick again.

Usually once is enough, but I repeat this whole procedure (lipstick-powder-press-lipstick) 3 times for long-lasting lipstick. Three times may seem extreme, but when you find a trick that works, you stick to it!
Read my review on the best lipstick for mature skin, the best drugstore lipstick and the best moisturizing lipstick to find the best one for you!
7. Set your foundation
After applying foundation, a setting powder is an essential product that should be incorporated as the final step in your base makeup routine. Setting powder seals the moisture of your base makeup and helps it last longer.
It also prevents makeup transfer or any melting that you’ll likely experience in the middle of the day, especially in the heat. The best piece of advice I ever got was to make sure to apply setting powder before the foundation and concealer dry. It helps seal it properly and let me tell you, it seriously works!
For those with dry skin, wearing face powder shouldn’t be a worry at all. Setting powder is still needed to finish off your makeup. Just make sure that the setting powder is made with dry skin in mind.
Another hack for setting powder is to apply setting powder after your primer, and before your foundation. It’s an age-old technique used by professionals even before the TikTok trend became viral.
For even longer-lasting makeup, consider using a setting spray after your setting powder. Not sure about the difference between the two? I cover all the differences between setting powder and setting spray here, along with a guide on which one you should use.
8. Wear face powder alone
If you’re not in the mood of wearing a base but still want a filtered-effect coverage, why not try wearing a face powder alone? It still helps even out the skin tone and blur pores and lines to give you healthy, natural-looking skin. This works especially well with tinted setting powders.
Translucent setting powders generally don’t cover up blemishes, but they still give the skin refining qualities. Try a non-comedogenic setting powder for that to ensure that your pores won’t clog (even if you have dry skin!).
9. Fix mistakes with your translucent powder
A really useful hack with translucent powder is to fix any makeup mistakes that you made! If you’ve applied too much blush, highlighter, or bronzer (whether cream or powder), dust over the area with translucent loose powder to take some colour away and tone it down. It also makes the surface appear smoother and more natural.
The reason setting powder is recommended and not a makeup remover, is because a makeup remover will cause streaks and you might have to redo your makeup all over again.
If you’re thinking of using a tissue, I can foresee you tugging and rubbing your skin and that’s a big no-no. Furthermore, you will leave fuzz behind and trust me, that’s not something you want. The easiest way to fix makeup mistakes is with a setting powder!
Recommended Setting Powders
My Thoughts on Setting Powder Hacks
These simple tips and hacks for your face powder are just a fun way to use what you have for your benefit! Setting powders are versatile, and multi-functional. They can help your makeup stay on longer and better in more ways than just with your base makeup!
UP NEXT: 30 Best Beauty Tips For Women Over 30
Hollie xx
About Hollie
Hi, I’m Hollie, and I own BeautywithHollie.com. I love everything to do with beauty and love sharing my knowledge, advice, and beauty finds! Makeup and beauty are here to enjoy, and Beauty With Hollie is here to take the stress out of it!
-

Trendy Haircuts and Hairstyles that will Transform Thin Hair
-

Easy Messy Bun Hairstyle Ideas for an Effortless Hair Look
-

The Best Black Friday Beauty and Makeup Deals for 2022
-

30 Of The Best Ulta Beauty Holiday Gift Sets For Every Budget
-

Scary, Fun, and Creative Halloween Hair Ideas To Try Out
-

16 Fall Hair Color Ideas That Are Trending Now For Brunettes, Blondes, and Redheads
-

Is The Dyson Hair Dryer Worth The Price?
-

The Best Flat Irons And Hair Straighteners in 2023
-

18 Hairstyles For Straight Hair That Are Cute And Trending
Anastasia Beverly Hills
bareMinerals
Benefit Cosmetics
Bobbi Brown
CeraVe
Chantecaille
Charlotte Tilbury
Clarins
ColourPop
Dermalogica
Dior
Dyson
e.l.f. Cosmetics
ELEMIS
Estée Lauder
Fenty Beauty
First Aid Beauty
Fresh
Giorgio Armani
Hourglass
Jane Iredale
L’Oreal
Lancome
La Roche-Posay
Laura Mercier
LORAC
MAC
Makeup Revolution
Maybelline
Morphe
Nars
Natasha Denona
Neutrogena
NYX
Origins
Peter Thomas Roth
Revlon
Sigma Beauty
Smashbox
Stila
Tarte Cosmetics
The Ordinary
Too Faced
Urban Decay
YSL
]]>
I love everything to do with makeup, and honestly always have. But makeup hasn’t always loved me! It took us a while to develop a good relationship, and the number one cause of that was my oily eyelids! Eyeshadow creasing and mascara smudging was an everyday occurrence.
If you have oily eyelids then you’ll be familiar with the scenario of acing your makeup, only for your eyes to be a smudged mess a mere hour later. Yep, it’s a real confidence killer. Looking back, a lot of my teenage years were filled with anxiety and nervousness over whether my makeup smudged.
But something good came from it. Through a ton of trial and error, I’ve become a real pro at applying eye makeup so that it stays intact the entire day.
I’ve put together game-changing makeup tips for oily eyelids. Say goodbye to smudged eyeshadow, eyeliner and mascara with these easy makeup hacks.
What causes oily eyelids?
Before we get into the actual tips on tacking oily eyelids, it’s good to know the causes and possible lifestyle changes that may help.
According to Medical News Today, there are quite a few different factors that can cause oily eyelids- excessive sebum secretion. The most common ones are:
- Hormonal changes
- Change in weather and humidity
- Genetics
- Using the wrong creams
- Stress
- Certain medication
Once you know the cause, you can plan appropriately and prepare your eyes better in those circumstances.
1. Use a non-greasy eye cream

Sometimes the reason you’re eyelids are greasy is the simple reason that you’re using the wrong skincare products. A simple way to reduce oily eyelids is to invest in a non-greasy eye cream. An eye cream for mature skin that tightens around the eyes and reduces hooded eyelids can also help.
2. Use an eyeshadow primer, not a concealer
A common eyeshadow technique to help eyeshadow stay on longer is to apply concealer on your eyelids. If you have oily eyelids, don’t waste your time or your money by wasting concealer.
Invest in a quality eye primer. An eye primer creates a barrier between the makeup and skin, giving your eyeshadow something to cling to. It doesn’t let the oil through and this trick alone has been a game-changer for me!
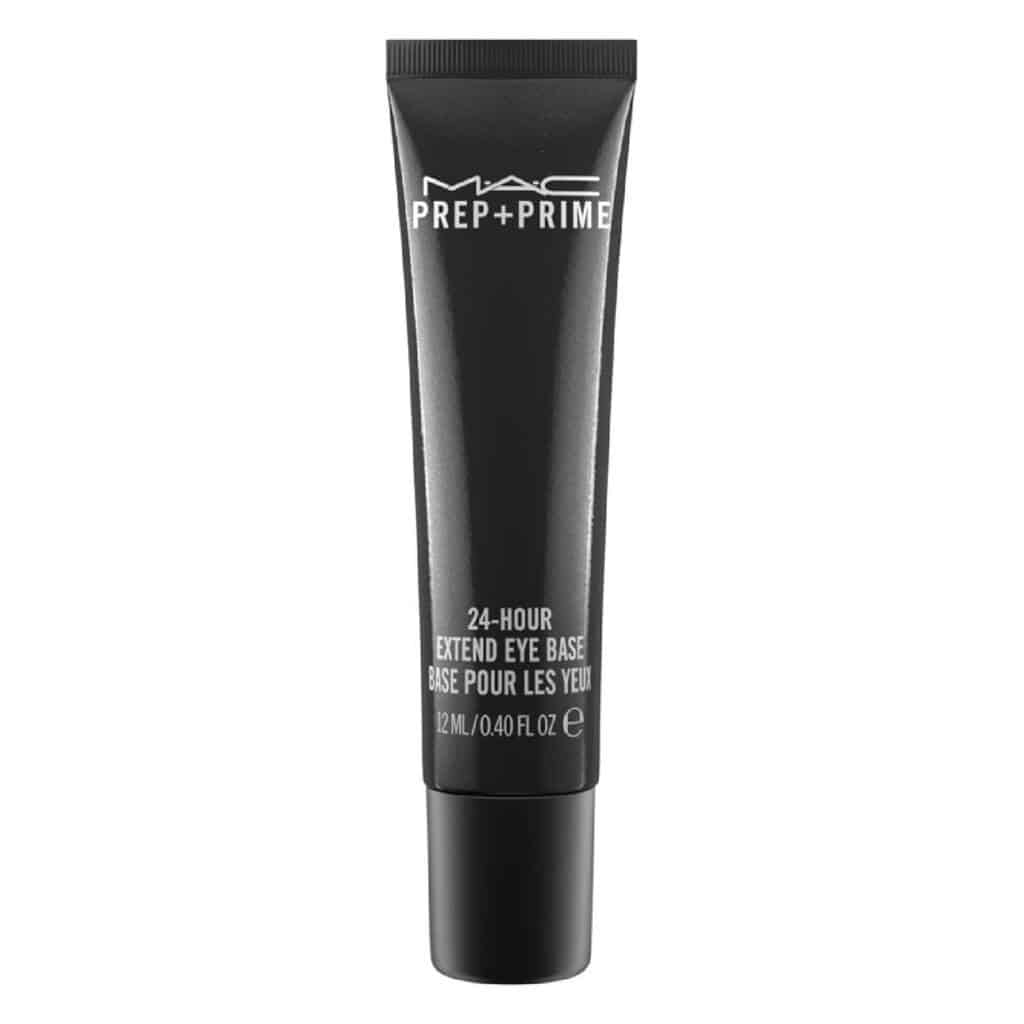
My favorite eye primer is the MAC Prep + Prime 24-Hour Eye Base. For my extremely oily eyelids, I needed a really strong primer, and the MAC one is like glue, it’s one of the best eye primers for oily eyelids. It’s smudge-proof for eyeliner, eyeshadow and mascara.
If you don’t need such a strong primer, I recommend the Urban Decay Eyeshadow Primer Potion. Both work really well and prevent creasing and smudging that tends to happen with oily eyelids.
3. Use Translucent Powder
Give your eyeshadow a tad more protection by applying a translucent setting powder on top of the eye primer. It mattifies the eyes and gives another layer of protection.
4. Use waterproof eyeshadow, eyeliner and mascara
Using waterproof makeup for the eyes is another tip that made all the difference for me. Using waterproof products means they don’t transfer, which means no smudging!
It’s easy to find quality mascaras and eyeliners that are waterproof. A great waterproof mascara is MAC In Extreme Dimension Lash and I’ve got a whole post dedicated to waterproof eyeliners.

When it comes to waterproof eyeshadow, there isn’t as much choice and they mostly come in cream formula. I recommend checking out Smashbox Always On Cream Eyeshadows which are waterproof and really great quality. The only disadvantage to them is that you need to buy each shade separately.
5. Stick to powder shadows
If you aren’t using a waterproof eyeshadow, stick to powder eyeshadows. They tend to last better than cream formulas and stick better to primer.
6. Blotting papers
Carry blotting paper around with you in your purse so that when you feel like your lids are too oily, you simply blot your lids. It is a great technique for getting rid of extra oil.
That being said, this trick works a lot better if you’re not wearing eyeshadow. If you’re wearing eyeshadow and you feel oily, chances are your eyeshadow is already creased. You can still use the blotting paper, but lightly dab so that you don’t ruin all your makeup in the process.
My Thoughts On How To Get Rid Of Oily Eyelids
Applying your makeup correctly and making a few lifestyle changes can have all the difference in how you look and feel. With these easy-to-implement tips, you can reduce your greasy eyelids and not only will you look better, but you’ll also feel a lot more confident.
If your oily eyelids are not manageable, speak to your Doctor. There are medical ways to reduce oily eyelids. These tips are not medical advice.
Looking for more skincare tips? Check out these top tips:
- 30 Best Beauty Tips For Women Over 30
- Top Tips on How to Cure Post-Party ‘Hangover Skin’
Hollie xx
About Hollie
Hi, I’m Hollie, and I own BeautywithHollie.com. I love everything to do with beauty and love sharing my knowledge, advice, and beauty finds! Makeup and beauty are here to enjoy, and Beauty With Hollie is here to take the stress out of it!
-
Everything You Need to Know About MAC’s Advent Calendar 2023
-
CurrentBody Skin Radio Frequency Device Review- Does it Work?
-
Eye Makeup Tips You Need To Try for Sensitive Eyes
-
How To Use Body Lotion and Its Benefits For the Skin
-
How To Apply Mascara Like A Pro- The Best Hacks, Tips & Tricks
-
City Lips Overnight Plumping Lip Oil: My Honest Review and Real Results
-
10 Easy Eye Makeup Tips & Techniques For Older Women Over 60
-
BareMinerals Complexion Rescue Tinted Moisturizer Review- Find Out The Truth
-
The Ultimate Guide to Different Types of Eyeshadows and Their Gorgeous Finishes
Anastasia Beverly Hills
bareMinerals
Benefit Cosmetics
Bobbi Brown
CeraVe
Chantecaille
Charlotte Tilbury
Clarins
ColourPop
Dermalogica
Dior
Dyson
e.l.f. Cosmetics
ELEMIS
Estée Lauder
Fenty Beauty
First Aid Beauty
Fresh
Giorgio Armani
Hourglass
Jane Iredale
L’Oreal
Lancome
La Roche-Posay
Laura Mercier
LORAC
MAC
Makeup Revolution
Maybelline
Morphe
Nars
Natasha Denona
Neutrogena
NYX
Origins
Peter Thomas Roth
Revlon
Sigma Beauty
Smashbox
Stila
Tarte Cosmetics
The Ordinary
Too Faced
Urban Decay
YSL